Key takeaways
- Take a quick photo of tubing and removable parts before disassembly so reassembly is straightforward.
- Never mix citric acid, bleach, vinegar, or other cleaners; use one approved method at a time.
- Keep the dispenser away from direct sun and heat sources, which can encourage odors and microbial growth.
- Use a dedicated cloth for the dispenser and launder it after cleaning to avoid transferring kitchen grease.
What's inside
A water dispenser can be one of the most useful pieces in a kitchen, home office, or entertaining area—but it is also an easy place for mineral scale, stagnant water, and hidden residue to collect. Regular cleaning protects the taste of your water, helps the appliance work efficiently, and keeps a hardworking countertop or floor-standing unit looking as polished as the rest of your interior.
This guide explains the best way to clean a water dispenser in 2026, from choosing the right descaler to flushing internal lines and washing removable parts. I’ll also cover filter timing, safety precautions, and a few practical tools that make the job less disruptive—especially if your dispenser is part of a carefully styled kitchen or dining space.
As an Amazon Associate we earn from qualifying purchases.




Recommended picks for a cleaner setup
For a large-capacity filtered dispenser, the Waterdrop WFD-22L Large Water Filter Dispenser is a practical choice, particularly for busy households that want fewer refills. Its long-life filter is designed to reduce chlorine and several common contaminants while keeping the footprint more useful than a collection of small bottles.
The Brio 520 Bottom Load Water Cooler Dispenser suits homes and offices that use five-gallon bottles and want hot, cold, and room-temperature options. Its bottom-loading format keeps the bottle out of sight, which is a welcome detail in an open-plan kitchen or a room where visual clutter matters.
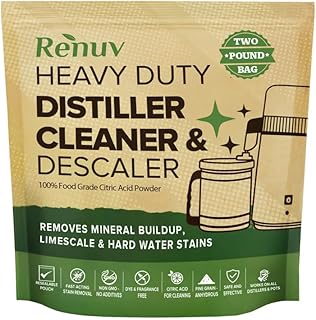
For mineral buildup, Renuv Citric Acid for Cleaning & Descaling Water Distillers is a versatile powder descaler. A dedicated Water Cooler Cleaning Kit can simplify routine sanitation, while the Holikme Bottle Brush Tube Cleaning Lab Set is useful for narrow spouts, bottle necks, drip trays, and removable tubing. If you prefer a compact filtered pitcher for everyday use, the Brita Metro Water Filter Pitcher with SmartLight Change Indicator is easy to keep in a refrigerator or drinks station.
1. Check the manual and prepare the dispenser
Before cleaning, identify whether your unit is top-loading, bottom-loading, countertop, or plumbed in. The manufacturer’s instructions should determine which parts may be removed and whether a particular cleaning solution is approved. Unplug models with heating or cooling functions, turn off the power switch, and remove the water bottle or disconnect the supply line.
Gather a clean bucket, soft cloths, a small brush, and either a manufacturer-approved cleaner or a mild citric-acid solution. Avoid abrasive powders, chlorine bleach unless the manual specifically permits it, and strongly perfumed household cleaners. These can damage seals, leave residue, or affect the taste of subsequent water.
2. Wash the removable parts first
Remove the drip tray, drip-tray grate, bottle support, faucet covers, and any other washable components. Empty standing water into the sink, then wash the parts with warm water and a small amount of unscented dish soap. A long-handled brush, such as the Holikme Bottle Brush Tube Cleaning Lab Set, helps reach narrow openings where a sponge cannot make proper contact.
Rinse every part thoroughly and let it air-dry on a clean towel. Do not reinstall pieces while they are still coated with soap. If the drip tray has developed a stale smell or visible film, soak it briefly in warm soapy water before brushing the corners and underside.
3. Descale the reservoir and internal water path
Minerals from hard water can form chalky deposits around faucets, reservoirs, heating elements, and valves. Citric acid is often a useful, relatively gentle descaler when the appliance instructions allow it. Dissolve the recommended amount in warm water, pour the solution into the reservoir or cleaning port, and allow it to sit for the time specified on the product or dispenser manual.
Do not heat the solution unless the instructions explicitly say to do so. After the dwell time, open each faucet in turn so the solution passes through the hot, cold, and room-temperature pathways where applicable. A purpose-made Water Cooler Cleaning Kit may be more convenient for bottle-style dispensers, especially when its nozzle is designed to connect with the reservoir opening.
For a bottom-loading unit, take extra care around the pump tube and bottle connection. Wipe the tube’s exterior and inspect it for slime, discoloration, or cracking. Replace damaged tubing rather than trying to clean it indefinitely.
4. Rinse until there is no cleaner taste
Drain the cleaning solution completely, then refill the reservoir with fresh potable water. Run water through every faucet and discard it. Repeat the flush at least once more, or follow the manufacturer’s stated rinsing procedure. The water should have no acidic, soapy, or chemical odor before the dispenser returns to service.
Wipe the faucets and surrounding surfaces with a clean damp cloth, then dry them. Reinstall the drip tray and other parts only after rinsing them again with fresh water. Restore power and allow cooling or heating functions to return to their normal operating temperature before use.
5. Set a realistic cleaning and filter schedule
A full cleaning every three months is a sensible baseline for many households, but high-use dispensers, warm rooms, and visible scale may call for more frequent attention. Empty and rinse the drip tray weekly, wipe the faucet area several times a week, and clean any bottle-contact surface whenever you replace the bottle.
Filters require their own schedule. Follow the stated capacity or time limit rather than waiting for a noticeable taste change. Pitchers such as the Brita Metro use a change indicator to make replacement easier, while built-in dispenser filters may need a calendar reminder. A clean appliance with an overdue filter can still produce disappointing water.
Tips
- Take a quick photo of tubing and removable parts before disassembly so reassembly is straightforward.
- Never mix citric acid, bleach, vinegar, or other cleaners; use one approved method at a time.
- Keep the dispenser away from direct sun and heat sources, which can encourage odors and microbial growth.
- Use a dedicated cloth for the dispenser and launder it after cleaning to avoid transferring kitchen grease.
Frequently Asked Questions
How often should I clean a water dispenser?
For most homes, clean the internal system about every three months and wash the drip tray weekly. Clean sooner if the dispenser develops an odor, the water tastes unusual, or you notice visible scale or residue.
Can I use vinegar to clean a water dispenser?
Only if the manufacturer permits it. Vinegar can help dissolve some mineral deposits, but its odor may linger and certain seals or finishes may not tolerate it. An approved citric-acid descaler is often a more controlled alternative.
How do I clean a bottom-load water cooler?
Unplug the unit, remove the bottle, and follow the manual’s instructions for accessing the reservoir and pump tube. Run the approved cleaning solution through each dispensing route, then flush repeatedly with fresh water before reconnecting the bottle.
Why does my water still taste strange after cleaning?
Incomplete rinsing, an overdue filter, a dirty bottle cap, or residue in the tubing can all be responsible. Flush the system again, replace the filter if due, and inspect removable parts and the bottle connection for trapped cleaner or biofilm.
Conclusion
The best way to clean a water dispenser is a careful combination of gentle washing, appropriate descaling, thorough flushing, and consistent filter replacement. Treat the dispenser like any other visible kitchen fixture: maintain the hidden working parts, polish the touchpoints, and choose compact cleaning tools that make the routine easy to repeat. The result is fresher-tasting water and a cleaner-looking drinks station that earns its place in your home.